Caffe环境的一些坑合集
Caffe install in alios7
官方教程
readme
1
2
3
4
5
6
7
8
9
10
11
12
13
14

    git clone --recursive https://github.com/rbgirshick/py-faster-rcnn.git
    $FRCN_ROOT = py-faster-rcnn

    cd $FRCN_ROOT/lib
    make

    cd $FRCN_ROOT/caffe-fast-rcnn
    # Now follow the Caffe installation instructions here:
    #   http://caffe.berkeleyvision.org/installation.html

    # If you're experienced with Caffe and have all of the requirements installed
    # and your Makefile.config in place, then simply do:
    make -j8 && make pycaffe
RHEL requires
1
2
3
4
5
6
sudo yum install protobuf-devel leveldb-devel snappy-devel opencv-devel boost-devel hdf5-devel

sudo yum install gflags-devel glog-devel lmdb-devel
# 依赖项未安装
protoc: Command not found
./include/caffe/util/mkl_alternate.hpp:11:19: fatal error: cblas.h: No such file or directory ```
如果失败,见链接手动安装
其他教程
Other dependency
- CUDA 可暂时不开
- Open BLAS install
1
2
3
4
5
6
7
8
9
10

    git clone https://github.com/xianyi/OpenBLAS.git
    cd OpenBLAS
    make -j4
    make install--

    配置一下 caffe 的makefile.config
    BLAS := open
    BLAS_INCLUDE :=  /opt/OpenBLAS/include
    BLAS_LIB := /opt/OpenBLAS/lib
- Boost install
1
2
3
4
5
6

    tar xvf boost_1_56_0.tar.bz2
    cd boost_1_57_0/
    然后运行:
     ./bootstrap.sh --with-libraries=system,thread,python,filesystem
     ./b2
- Pyconfig.h not such file
/usr/local/include/boost/python/detail/wrap_python.hpp:50:23: fatal error: pyconfig.h: No such file or directorysudo yum install python-devel.x86_64
-
hdf5源码安装
No match for argument: hdf5-devel Error: Unable to find a match: hdf5-develdownload hdf5 - check 一下version
- Headers are 1.8.18, library is 1.8.12
https://www.hdfgroup.org/downloads/hdf5/
- ImportError: No module named skimage.io
sudo pip install scikit-image
1
2
3
4
5
6

    Installing collected packages: pyparsing, backports.functools-lru-cache, subprocess32, pytz, python-dateutil, kiwisolver, cycler, matplotlib, scikit-image

    Cannot uninstall 'pyparsing'.
    # 安装较新的版本
    sudo pip install -I pyparsing==2.2.0
https://blog.huihut.com/2018/10/13/PyparsingFailsToUninstallCausingErrorInInstallingMatplotlib/
- leveldb 手动安装1.7.0版本
1
2

    https://www.cnblogs.com/Crysaty/p/6272994.html
- 手动安装opencv
https://blog.csdn.net/antony1776/article/details/73528028 手动安装opencv ,然后拷贝到python库中
1
2
3
4
5
6
7
8
9

    wget https://github.com/opencv/opencv/archive/2.4.13.zip

    cmake -D CMAKE_BUILD_TYPE=RELEASE -D CMAKE_INSTALL_PREFIX=/usr/local -D BUILD_NEW_PYTHON_SUPPORT=ON -D BUILD_EXAMPLES=ON .
    make
    make install

    cp ./lib/cv2.so /usr/lib/python2.7/site-packages/
    cp ./modules/python/src2/cv.py /usr/lib/python2.7/site-packages/
-
可能依赖的python模块
- ImportError: No module named easydict Cpython
sudo yum install Cythonsudo pip install easydict - ImportError: No module named google.protobuf.internal
sudo pip install protobuf - ImportError: No module named google.protobuf.internal
sudo yum install tkinter
- No module named cv2
sudo pip install opencv-python
https://stackoverflow.com/questions/19876079/cannot-find-module-cv2-when-using-opencv
- 手动安装opencv即可
- need caffe
1
2
3
4
5
6

    Traceback (most recent call last):
      File "./tools/demo.py", line 18, in <module>
        from fast_rcnn.test import im_detect
      File "/data/home/lingyao.zcq/py-faster-rcnn/tools/../lib/fast_rcnn/test.py", line 16, in <module>
        import caffe
- 手动安装libglog
/usr/local/lib/libglog.a: error adding symbols: Bad value collect2: error: ld returned 1 exit status
1
2
3
4
5
6
7
8
9
10
11
12
13

    CXXFLAGS="-O3 -fPIC" ./configure
    安装目录
    /usr/bin/install

    wget https://storage.googleapis.com/google-code-archive-downloads/v2/code.google.com/google-glog/glog-0.3.3.tar.gz
    tar zxvf glog-0.3.3.tar.gz
    cd glog-0.3.3
    #./configure
    ./configure CXXFLAGS=-fPIC
    make && sudo make install

    再看一是否需要拷贝到/usr/lib
- 需要使用 -fPIC 重新编译
- 类似问题 可能出现在 protobuf/gflags/glog
下载源码,添加CFLAG=”-fPIC”进行编译
https://blog.csdn.net/h_jlwg6688/article/details/52410959
https://stackoverflow.com/questions/33634711/caffe-recompile-with-fpic-libglog-a-error
- make runtest 出错 已解决,需要添加环境变量
1
2
3
4
5
6
7
8
9
10
11

    Warning! ***HDF5 library version mismatched error***

    export LD_LIBRARY_PATH=/usr/local/OpenBlas/lib:$LD_LIBRARY_PATH
    export LD_LIBRARY_PATH=/usr/local/lib:$LD_LIBRARY_PATH
    export LD_LIBRARY_PATH=/usr/lib:$LD_LIBRARY_PATH

    down vote accepted I added the line ->
    /usr/local/lib to /etc/ld.so.conf
    and then ran sudo ldconfig.
    Problem solved.
usage
已跑通文晖工程,作为验证
1
2
3
4
5
6
7
8
9
10
11
12
13
14
15
16
17
18
19
20
21
22
23
24
25
26
27
28
29
30

    git clone git@gitlab.alibaba-inc.com:EdgeDet/caffe_faster_rcnn_quantize.git

    cd caffe_faster_rcnn_quantize

    # compile lib
    cd lib
    make -j
    cd ../

    # compile caffe
    cd caffe-fast-rcnn
    make -j && make pycaffe


    cd caffe_faster_rcnn_quantize
    # 替换友本的net.cpp
    注意将其开关打印宏定义打开,再重新编译
    +//#define PRINT_IN
    +//#define PRINT_OUT

    打开后,再次运行model,会把input和output写到一个名为 dumpgraph.txt 的文件中。
    # 重新make -j && make pycaffe
    # 2d model

    # run demo
    $python quantize_pose/demo_inference.py ../faster_hema_poseattv6_630_bias_split_no_inplace_quant_merge_3.prototxt ../faster_hema_poseatt_v6_630_bias_split_no_inplace_quant_merge_3.caffemodel --images_path_list poselist.txt --images_root_folder ./posetest/

    # --images_path_list   图片列表保存图片路径的list
    # --images_root_folder 真是图片存放的文件夹 ./posetest/
另一个文档
安装Caffe
下载caffe
git clone https://github.com/BVLC/caffe.git
依赖安装
这个步骤是最繁琐的,因为alios(CentOS7)并不像Ubuntu可以一键式apt install,许多需要手动安装。
- 需要安装的yum Package
1
2
3
4
5
6
7
8
9
10
11
12
13

    sudo yum install protobuf-devel leveldb-devel snappy-devel opencv-devel boost-devel hdf5-devel

    sudo yum install gflags-devel glog-devel lmdb-devel

    # if u find Error :"Pyconfig.h not such file"
    sudo yum install python-devel.x86_64

    # if u find Error :"ImportError: No module named easydict Cpython"
    sudo yum install Cython

    # if u find Error : ImportError: No module named google.protobuf.internal
    sudo yum install tkinter
- 需要安装的pip package,在运行demo.py的时候可能遇到的问题。
1
2
3
4
5
6
7
8
9
10
11
12
13
14
15
16
17
18

    # ImportError: No module named skimage.io
    sudo pip install scikit-image
    # 如果安装未成功scikit-image
    # Cannot uninstall 'pyparsing',安装较新的版本
    sudo pip install -I pyparsing==2.2.0

    # numpy 版本过低,卸载不掉,影响其他版本安装,直接安装对应版本即可
    sudo pip install -U numpy==1.12.0

    # ImportError: No module named easydict
    sudo pip install easydict

    # ImportError: No module named google.protobuf.internal
    sudo pip install protobuf

    # No module named cv2
    sudo pip install opencv-python
-
可能需要手动安装package 当前面yum安装失败,或者make出现无法找到 libxxx.a时,首先检查是否已经安装,否则需要手动安装。 安装原则,缺啥补啥。
-
Open BLAS install
1
2
3
4
5
6
7
8
9
10

    git clone https://github.com/xianyi/OpenBLAS.git
    cd OpenBLAS
    make -j4
    make PREFIX=/path/to/your/installation install

    配置一下 caffe 的makefile.config
    BLAS := open
    BLAS_INCLUDE :=  /path/to/your/installation/include
    BLAS_LIB := /path/to/your/installation/lib
- Boost install
1
2
3
4
5
6
7
8
9

    # download url
    https://sourceforge.net/projects/boost/files/boost/1.57.0/boost_1_57_0.tar.bz2/download

    tar xvf boost_1_57_0.tar.bz2
    cd boost_1_57_0/
    # 然后运行:
     ./bootstrap.sh --with-libraries=system,thread,python,filesystem
     ./b2
- 手动安装libglog
1
2
3
4
5
6
7
8
9
10

    wget https://storage.googleapis.com/google-code-archive-downloads/v2/code.google.com/google-glog/glog-0.3.3.tar.gz
    tar zxvf glog-0.3.3.tar.gz
    cd glog-0.3.3
    #./configure
    CXXFLAGS="-O3 -fPIC" ./configure
    make && sudo make install

    `/usr/bin/ld: /usr/local/lib/libglog.a(logging.cc.o): relocation R_X86_64_32 against `.rodata' can not be used when making a shared object; recompile with -fPIC`
    # 类似问题 可能出现在 protobuf/gflags/glog
- Leveldb install
1
2
3
4
5
6
7

    cd ~/caffe
    tar –xvf leveldb-1.7.0.tar.gz
    cd leveldb-1.7.0
    make -j32
    cp libleveldb* /usr/lib/
    cp –r include/leveldb /usr/local/include
- 安装hdf5
1
2
3
4
5
6
7

    cd ~/caffe
    tar –xvf hdf5-1.8.8.tar.bz2
    cd hdf5-1.8.8
    ./configure --prefix=/opt/hdf5
    make
    make install
修改makefile.config
- 为简洁安装 设置为CPU_Only
将
CPU_ONLY := 1在Makefile.config中打开即可 - 注意在安装完成第三方库后,设置对应的lib_src
直接make
如果依赖完全安装,则make过程较为简单。
1
2
3
4
5
6

    cp Makefile.config.example Makefile.config
    # Adjust Makefile.config (for example, if using Anaconda Python, or if cuDNN is desired)
    make all
    make test
    make runtest
- 注意在make runtest的时候,会调用第三方库,我们需要将其对应环境变量配置好 例如
1
2
3
4
5
6
7

    export LD_LIBRARY_PATH=/usr/local/OpenBlas/lib:$LD_LIBRARY_PATH
    export LD_LIBRARY_PATH=/home/lingyao.zcq/caffe_depend_opt/OpenBLAS/lib:$LD_LIBRARY_PATH
    # hdf5
    export LD_LIBRARY_PATH=/usr/local/lib:$LD_LIBRARY_PATH
    export LD_LIBRARY_PATH=/usr/lib:$LD_LIBRARY_PATH
    export LD_LIBRARY_PATH=/home/lingyao.zcq/depend/protobuf:$LD_LIBRARY_PATH
算法团队的项目
http://gitlab.alibaba-inc.com/EdgeDet/caffe_faster_rcnn_quantize
项目make
1
2
3
4
5
6
7
8
9
10
11
12
13

    git clone git@gitlab.alibaba-inc.com:EdgeDet/caffe_faster_rcnn_quantize.git

    cd caffe_faster_rcnn_quantize

    # compile lib
    cd lib
    make -j
    cd ../

    # compile caffe
    cd caffe-fast-rcnn
    make -j && make pycaffe
- 注意问题, 因为依赖开源项目caffe-fast-rcnn,所以克隆的时候要递归的把GitHub的项目也要download git submodule update –init –recursive
-
注意make的顺序
- 首先要make Cython
- 然后make caffe-fast-rcnn(与caffe类似)
使用方法
- 友本当前实现的是输入输出的数据dump功能,编译时需要打开宏定义
1
2
3
4
5
6
7

    cd caffe_faster_rcnn_quantize
    # 替换友本的net.cpp
    注意将其开关打印宏定义打开,再重新编译
    +//#define PRINT_IN
    +//#define PRINT_OUT
    make -j && make pycaffe
- 运行demo
1
2
3
4
5
6

    # run demo
    $python quantize_pose/demo_inference.py ../faster_hema_poseattv6_630_bias_split_no_inplace_quant_merge_3.prototxt ../faster_hema_poseatt_v6_630_bias_split_no_inplace_quant_merge_3.caffemodel --images_path_list poselist.txt --images_root_folder ./posetest/

    # --images_path_list   图片列表保存图片路径的list
    # --images_root_folder 真是图片存放的文件夹 ./posetest/
第三个文档
- 缺少libz.so
usr/bin/ld: cannot find -lz
yum install zlib-devel
https://www.cyberciti.biz/faq/centos-install-zlib-devel/
- 缺少libopencv 库
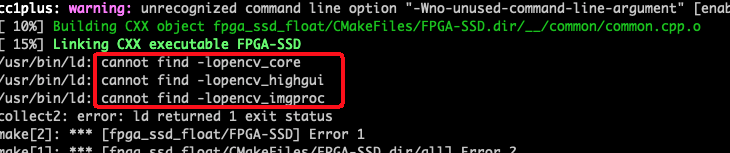
安装opencv
1
2
3
4
5

    sudo yum install opencv opencv-devel opencv-python
    # check version
    pkg-config --modversion opencv
    2.4.5
https://linuxize.com/post/how-to-install-opencv-on-centos-7/
- 需要升级
freetype
1
2
3

    sudo yum install freetype
    # sudo yum install cairo-devel